Are you looking for tips on a garage door spring repair? If yes, you are in the right place.
Your interaction with the garage door and its opening mechanism is all about pressing the remote to raise or lower it down. You may never have paid much attention to how the entire thing works, which is fine as most of us do the same.
However, have you ever thought, what if you press the remote and the door does not respond? Is it something that you can fix yourself, or is there a garage door mechanic that you can go to? Well, the answer to these questions is a “yes.”
If your garage door breaks down, chances are, it is the garage door spring that needs repair. Let us dive a little deeper into how we can carry out the garage door spring repair.
Torsion Springs vs. Extension Springs
There are mainly two types of springs on garage doors, i.e., tension springs and extension springs. However, if they get broken, you will have to replace them. You can easily identify which type of spring you have by simply looking at your garage door.
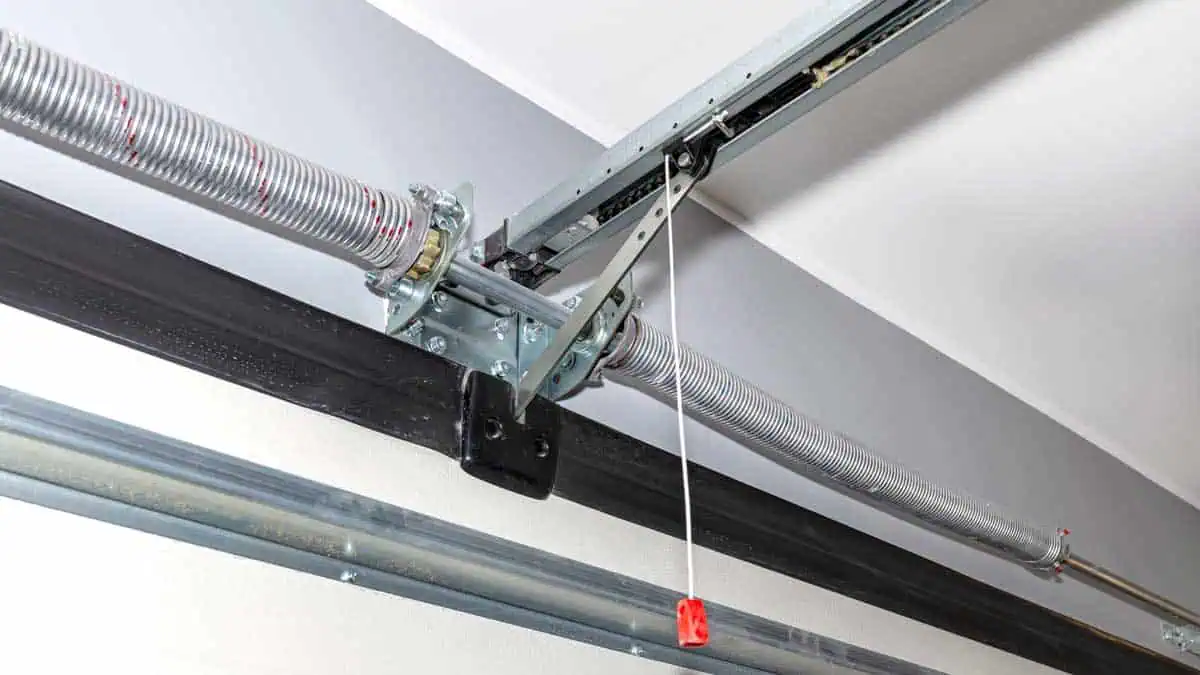
If your garage door system has long springs running on either side of your door, you have extension springs. These springs are thin, long, and up in the air. On the other hand, torsion springs are bulkier and sit on a metal rod right next to your garage door opening.
Old doors had a single piece swinging up in the air with vertical springs running on both sides of your door. They are side springs and complement the other extension springs.
Both torsion and extension spring operate in a similar fashion, i.e., they use your garage door’s gravity and weight for tension and load as it closes. This gives your garage door the reserved energy to lift the door next time you open it.
However, what differentiates the two springs is as follows:
- The extension springs stretch to load and store the energy outward, wanting to regain its position
- The torsion springs twist when you lower the doors; therefore, they untwist, releasing the energy when you open the door.
Tools You May Require
Before you start the repair, you will require the following equipment, just in case.
- An adjustable wrench
- A cordless drill
- Clamps
- A hammer
- Protective leather gloves
- Locking pliers
- Safety glasses
- Rags
- Ratchet/socket set
- Winding bars and
- A wrench set.
Apart from that, you may require other materials such as bottom brackets, lift cables, and of course, new springs for replacing.
Be Careful
When you engage in a garage door spring repair, most problems are easy to fix. However, if the malfunction occurred due to an issue with your garage door’s springs, this is where things get serious.
Just in case you do not know what a garage door spring is – it is responsible for providing force to lift the heavy garage door using tremendous tension. So, be careful when handling the spring, or you may hurt yourself.
That said – if you follow the right instructions using the apt tools, you can successfully carry out garage door spring repair on your own in a matter of hours.
Replacing the Extension Springs
These springs are the easier of the two when it comes to garage door spring repair. You can easily remove and replace the entire extension springs on your garage door. Plus, you need not worry about the caution for danger due to the springs lashing out on you.
Simply open your garage door, this will help the extension springs lose most of the tension, and now they are safe for you to handle. However, whenever you open the garage door and start working, always secure your garage door with clamps. This way, you can prevent it from sliding down on you during the process.
Now all you need to do is simply disconnect the extension springs from their brackets, cables, and pulley. The next step would be installing the new extension springs and attaching them to the pulley, safety cables, and voila! Your garage door is good to go.
Replacing the Torsion Springs
The torsion springs are more dangerous to handle than extension strings. Thus, you must be extra vigilant when working with them. The reason you need to pay extra attention is that the torsion springs conserve a lot of energy. Mishandling can release all that energy to lash out, injuring you in the process.
Torsion springs are under a tremendous amount of tension, and you need to remember this at all times.
That said, now that you are about to carry out garage door spring repair by replacing the torsion spring, you will need a winding bar. This will help you easily twist or untwist the torsion springs to adjust their torsion.
If you look closely, every torsion spring has a winding cone at its end, and this is where your winding bar fits on to either twist or untwist the entire spring. However, go slow when turning the bar and continue to press the spring against your garage door to release them slowly.
Make sure that your garage door is in a closed position when replacing the torsion springs. Typically, there will be only two torsion springs for you to handle. In case if either of them is broken, well, that makes half of the task easy.
Once you have unwound and removed the garage door’s springs, you will need to windup the new torsion springs for installation.
Common Mistakes You Must Avoid
Sometimes people feel too confident when deciding to do the garage door spring repair all by themselves and end up making some major errors. You must always follow the following tips for your safety.
- Never try winding the torsion springs using a screwdriver
- Avoid winding the torsion springs too loose or too tight
- Always buy the right type of garage door springs
- Always use vice grips when working on an open garage door
Let the Experts Help
If you consider doing the garage door spring repair all by yourself but do not feel 100% confident, it is wise to get a professional to do it for you. This will ensure that your garage door springs are in place, secure and safe, and rectify any chances of injury or accidents.


